Smart Guide to How to Use Snipping Tool in 2025: Effective Tips for Screenshots
Smart Guide to How to Use Snipping Tool in 2025: Effective Tips for Screenshots
Understanding the Basics of the Snipping Tool
The **snipping tool** is an essential application that many users rely on for taking screenshots effortlessly. This handy tool comes pre-installed on Windows operating systems, making it accessible for users and offering various options tailored to individual needs. Understanding **how to use the snipping tool** effectively is crucial for anyone seeking to capture high-quality images of their screen for personal or professional use. Whether you’re sharing feedback, creating tutorials, or simply saving information, mastering the **snipping tool** will enhance your productivity.
Features of the Snipping Tool
The **snipping tool features** a user-friendly interface that simplifies the screen capturing process. Users can choose from different snip types, such as a rectangle, free-form, window, or full-screen snip. Each type suit various needs—if you want to capture a specific part of your screen, select the rectangle or free-form option. To capture an entire window without distractions, opt for the window snip. The tool also allows for easy edits and options, including **snipping tool annotation** capabilities, which make it simpler to add notes or highlights to your captures.
How to Capture Screen with Snipping Tool
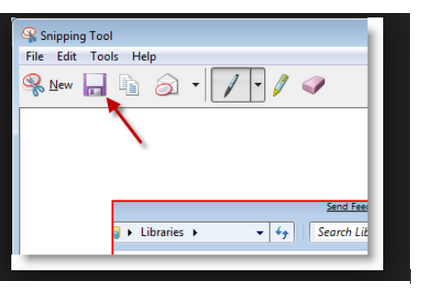
To **capture screen with snipping tool**, start by launching the application, which you can find by searching for “snipping tool” in the Start menu. Once opened, click on “New” and choose your desired snip type. After making your selection, drag the cursor to define the area you wish to capture. When you release the mouse button, the snip will appear in the Snipping Tool window, where you can further customize it. Lastly, remember to **save your image** in your preferred format to ensure it’s easily retrievable later on.
Snipping Tool Options and Settings
<pAdjusting the **snipping tool settings** can significantly enhance your user experience. Within the tool's settings, you can specify keyboard shortcuts for quicker access, choose your default snip type, and adjust the delay for timed snips. If you're experimenting with the various **snipping tool options**, it's invaluable to find a setup that suits your workflow, allowing quicker access during presentations or urgent tasks.
Advanced Tips for Using the Snipping Tool
Even if you’re familiar with the basics of the **snipping tool**, there are advanced techniques and tips that can optimize your screen capturing efficiency. Knowledge of these advanced features can put you ahead in creating detailed, informative content effortlessly.
Using Snipping Tool for Editing
The **snipping tool for editing** provides various tools that make it easier to annotate or enhance your snapshots. Once you capture an image, utilize the highlighter, pen, or eraser options to add emphasis or clarify points. This functionality is particularly useful when creating tutorial content where visual clarity is paramount. Leverage these editing options to enhance your screenshots before sharing, ensuring your message reaches your audience smoothly.
Maximizing Productivity with Snipping Tool Shortcuts
Mental agility can be crucial in our fast-paced digital environment, and **snipping tool shortcuts** can boost productivity significantly. Familiarize yourself with the keyboard shortcuts that versions of the application offer, such as pressing “Windows + Shift + S” to open the snipping tool quickly. This shortcut brings up an overlay for snipping whenever you need to capture moments on your screen instantly, streamlining your workflow.
Comparing Snipping Tool vs. Snip & Sketch
When exploring your options for screenshot utilities, a common question arises: What’s better – the **snipping tool vs. snip & sketch**? While both applications serve similar purposes, Snip & Sketch provides additional features, such as more sophisticated editing tools and a simplified share option. If your primary need is to take quick screenshots during presentations or for documentation, the classic **snipping tool** may suffice. However, for users looking for enhanced functionality, Snip & Sketch might offer an edge.
Snipping Tool Tips and Best Practices
To make the most out of the **snipping tool**, incorporating best practices into your routines will help yield better results. Setting up systematic ways to organize your screenshots and employing effective snipping techniques will create efficiency in your documentation processes.
Organizing Screenshots for Better Accessibility
Maintaining a system for organizing your **snipping tool** screenshots is essential for documented projects. Consider creating folders categorized by themes, dates, or projects where your snips will belong. Having a keen organizational strategy helps in quickly retrieving images when needed, enhancing your professional workflow and ensuring your digital files are aligned with your operational needs.
Utilizing Snipping Tool for Presentations
Incorporating screenshots into presentations can elevate your delivery. By strategically using the **snipping tool for presentations**, you can create dynamic content that engages your audience. Capture key platform visuals to clarify your points, use annotations to guide your audience’s focus, and always preview your images to ensure they download and upload properly during meetings. Tailoring visuals through the **snipping tool** makes your sessions more interactive and informative.
Exploring Snipping Tool Alternatives
Sometimes, users may seek applications that complement or serve as an alternative to the **snipping tool**. Options such as ShareX and Greenshot provide additional features for more demanding users, including cloud sharing and advanced editing functions. Knowing these **snipping tool alternatives** opens doors to diverse editing options that can fit varied working styles and needs.
Key Takeaways
- Familiarize yourself with the various features and snipping options.
- Utilize keyboard shortcuts for efficient screen captures.
- Organize your screenshots systematically for quick retrieval.
- Incorporate advanced editing to enhance the clarity of your visuals.
- Explore alternatives to discover tools that might better suit your needs.
FAQ
1. What are the main snipping tool features I should know?
Understanding the main **snipping tool features** such as different capture modes (rectangle, freeform, window, and full-screen) and annotation options will enable you to customize your screenshots effectively. Additionally, becoming familiar with the saving and editing features will help streamline your workflow when creating documentation or presentations.
2. How do I troubleshoot common snipping tool issues?
If you’re facing difficulties with the **snipping tool**, consider checking for updates or reinstalling the application. Sometimes, simply restarting your computer can resolve temporary glitches. In case these steps do not work, look up online communities for **snipping tool troubleshooting** advice that may provide additional insights specific to your issue.
3. Can the snipping tool be used on Mac systems?
The **snipping tool** is primarily a Windows application. However, Mac users can access similar functionality through alternatives like “Screenshot” or “Snip & Sketch,” which offer comparable features for screen capturing. Researching suitable solutions will help ensure that Mac systems can also achieve efficient screen capturing.
4. How do I install the snipping tool if it’s not on my device?
If your device lacks the **snipping tool**, you can download it from the Microsoft Store or Windows official website. The application typically comes pre-installed on Windows 10 and later models; however, installation may still be required in earlier versions. Always ensure you download from trusted sources for your system security.
5. Are there limits to the formats I can save screenshots in?
The **snipping tool** allows you to save images in standard formats such as PNG, JPEG, and GIF. Knowing these options is essential to select the right format for your specific needs, whether it’s social media sharing, documentation, or emails.
6. What are the advantages of using the snipping tool on Windows 10?
Using the **snipping tool Windows 10** version offers numerous benefits, including integration within the system, ease of use, and availability of varied **snipping options**. The tool also allows you to take screenshots quickly, providing immediate access to editing features so that users can share their captures promptly.
7. Can the snipping tool enhance teamwork in projects?
Absolutely! Using the **snipping tool** facilitates collaboration by allowing team members to capture and share screenshots of their work instantly. This visual form of communication fosters clarity and understanding of project tasks among members, supporting effective teamwork strategies.